Popular as Mac OS is at present, its in compatibility with many apps is still a headache for many Mac users. As a powerful tool for entertainment, especially for watching movies, Mac also needs a powerful video converter.
Video Converter for Mac, as the best Mac video converter, can not only help Mac users get rid of the annoying compatibility issues, but also provide the best video quality after conversion. This tutorial will focus on how to convert videos on Mac with Video Converter for Mac.
Since Video Converter for Mac can help Mac users to capture photos from the video, set the output file, edit the output video and add 3D effects to the video, this tutorial consists of four parts.
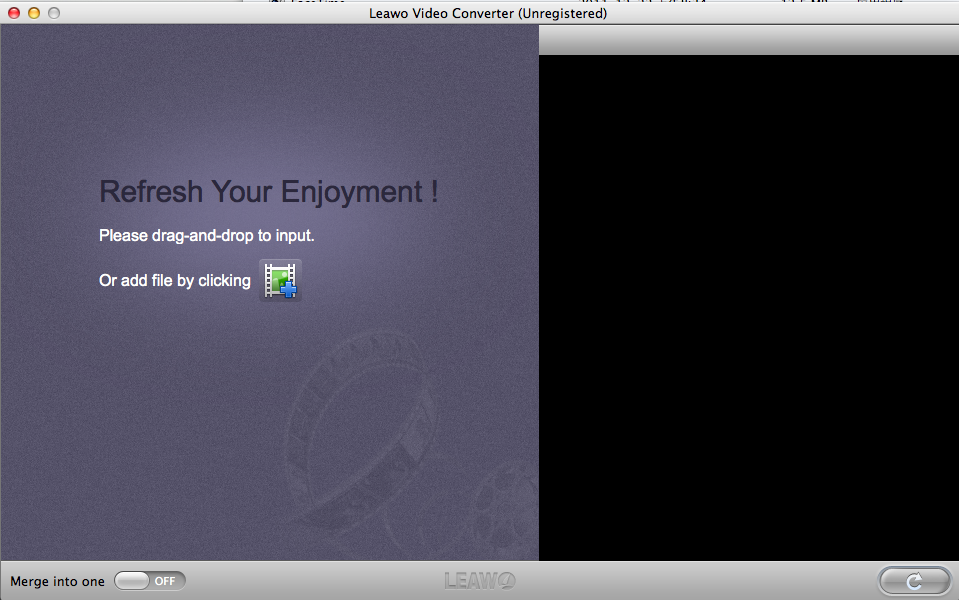
Step 1: Download Video Converter for Mac, install it and launch it.
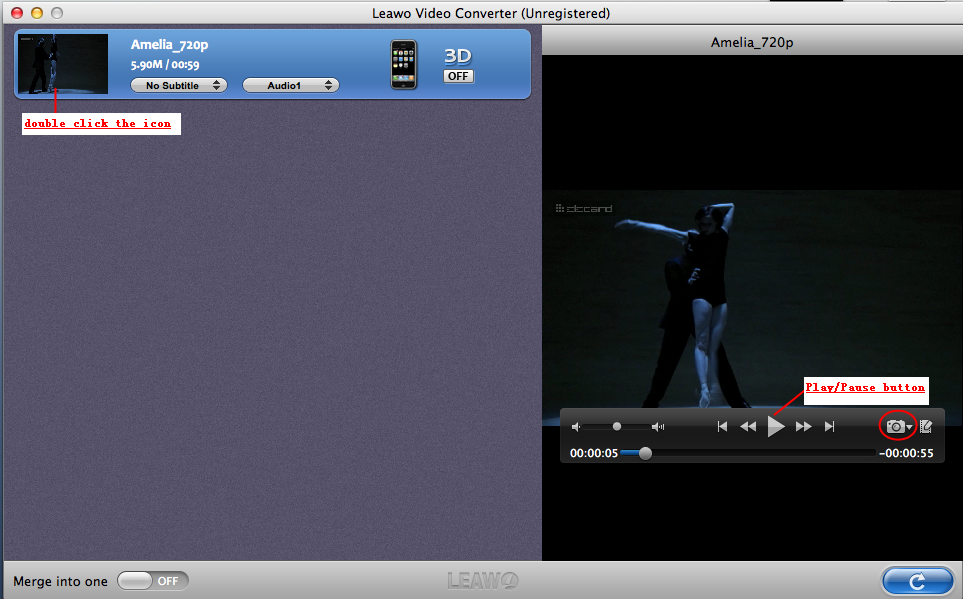
2. Capture images from the video
To preview the video, Mac users can either double clicking the video icon in the left part of the interface or click "Play/Pause" button in the player. The camera icon lying next to the “Play next video” button is the snapshot button with which Mac users can capture the images from the video freely. Just click the snapshot button is what they need to do. The image file they get is usually PNG file by default.
3. Set output file
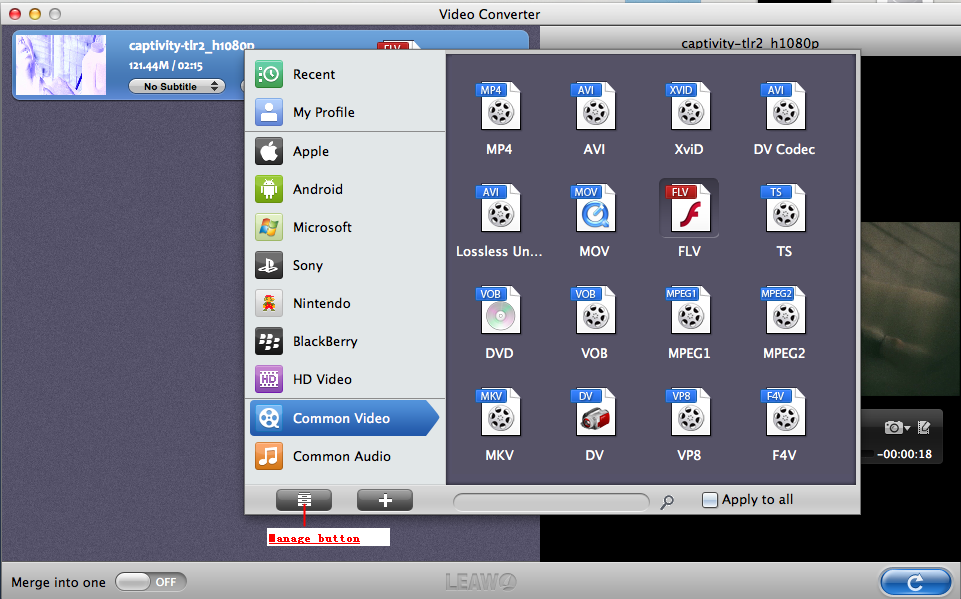
a). Set output file format. Mac users can set the output format by clicking the icon next to 3D icon. Select the video format you want in the drop-down menu.
If Mac users just need to convert video for some specific portable devices, they can save a lot of time by customizing the drop-down menu.
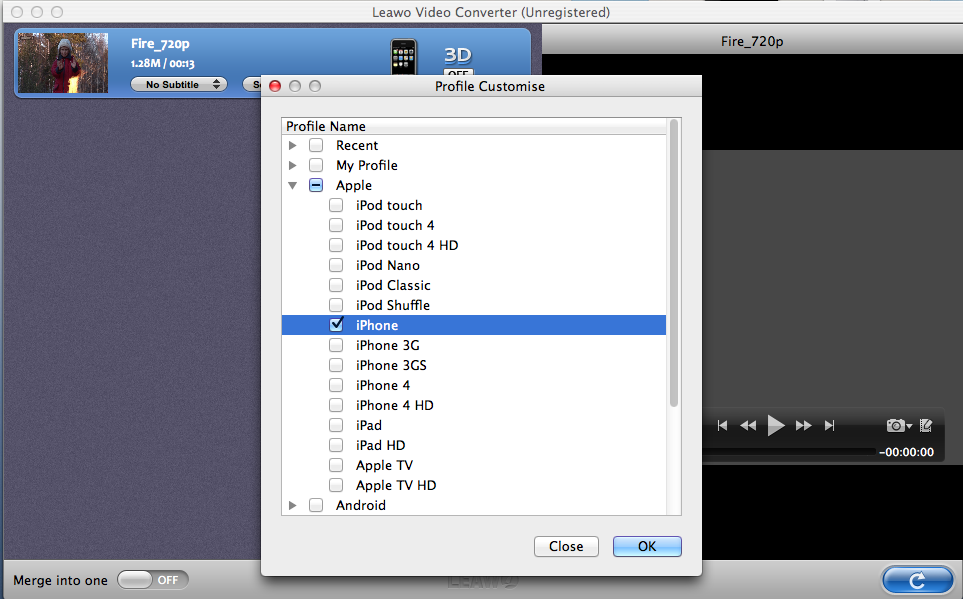
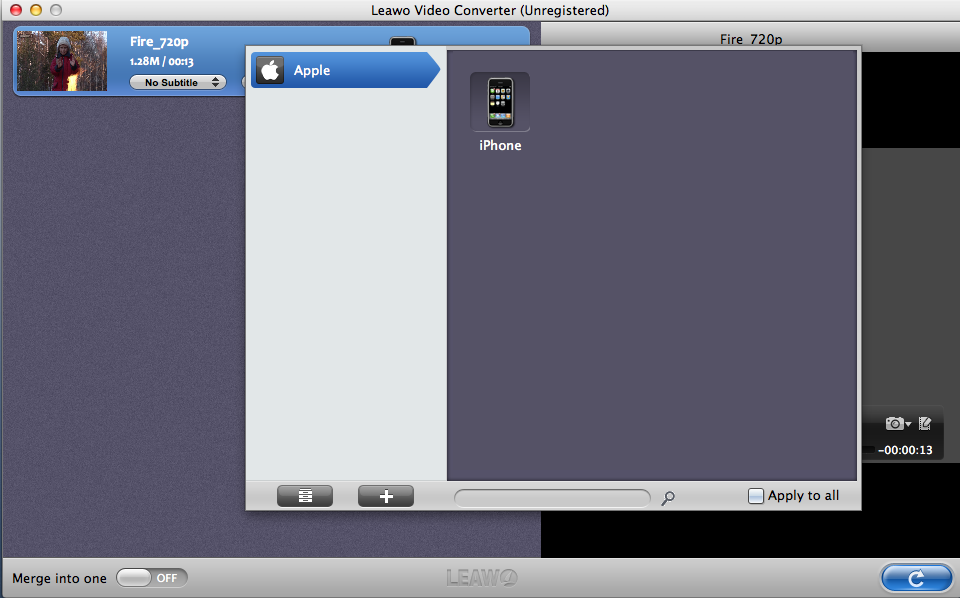
Here we take iPhone for example, click “Manage” button in the drop-down menu and then uncheck all the option except iPhone. After that, Mac users will surprisingly find that only video formats for iPhone are available in the drop-down list.
b) Set output video size and quality
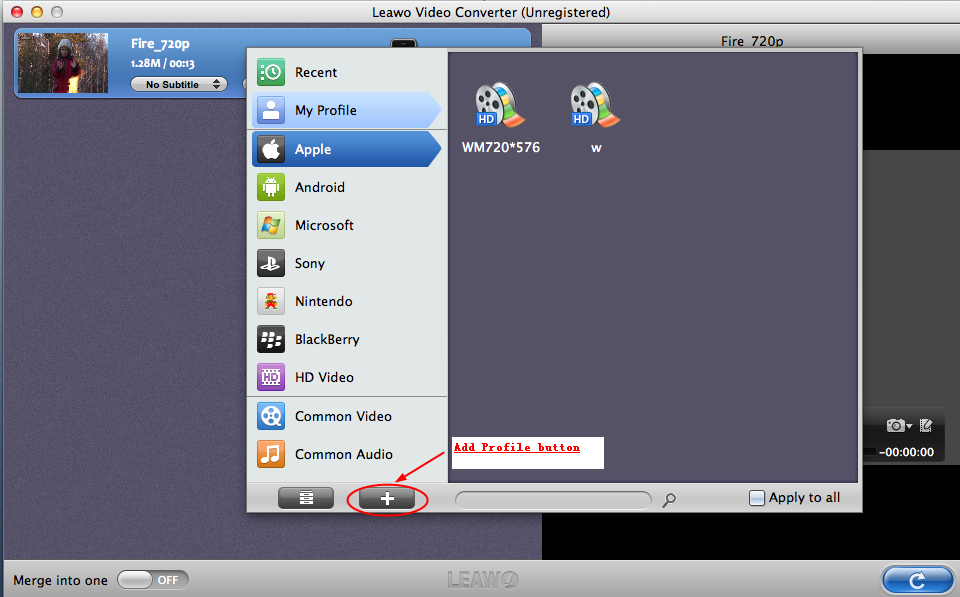
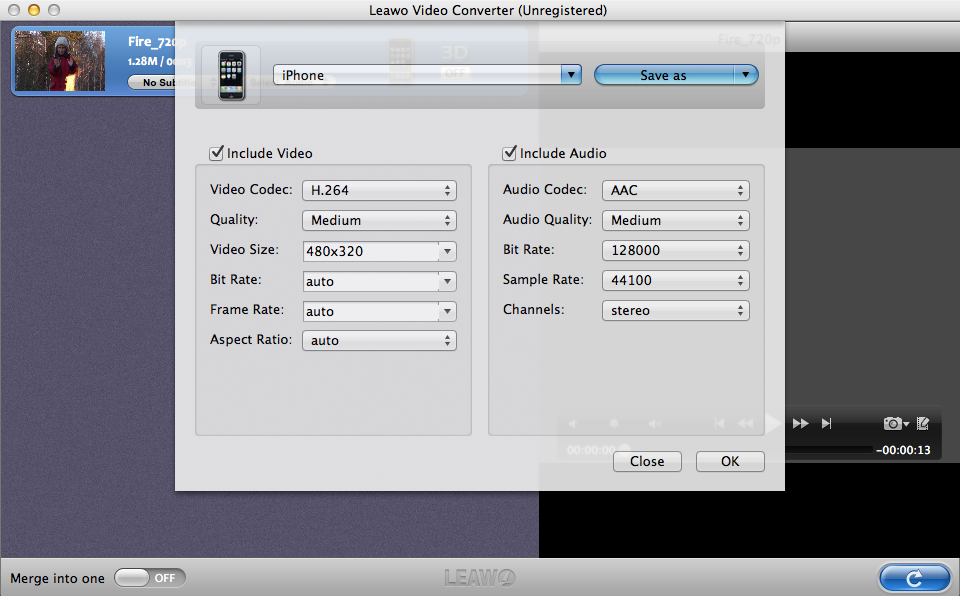
Not only can Mac users choose the format of the output file, but also customize video size and quality of the output file. Click “Add Profile” button lying next to “Manage” button. Mac users can customize options like “Video Codec”, “Quality”, “Video Size”, “Bit Rate” and so on via the corresponding boxes.
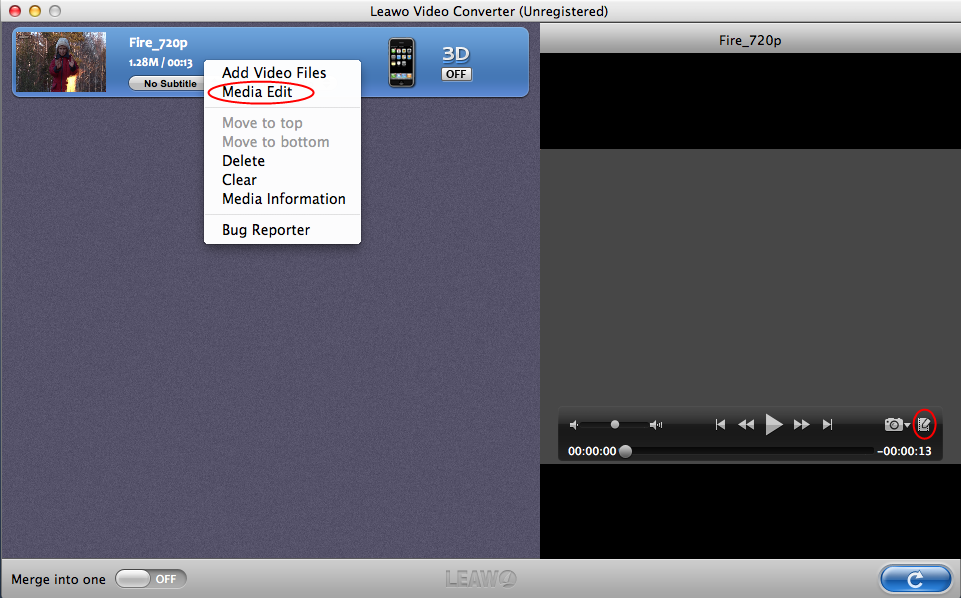
Step 3: Edit output video. Various functions are provided for Mac users to edit the output video. However, Mac users need to enter “Media Edit” interface at first. Here two methods are provided. Right click the video icon in the left and choose “Media Edit” option or click “Edit” icon next to the camera icon.
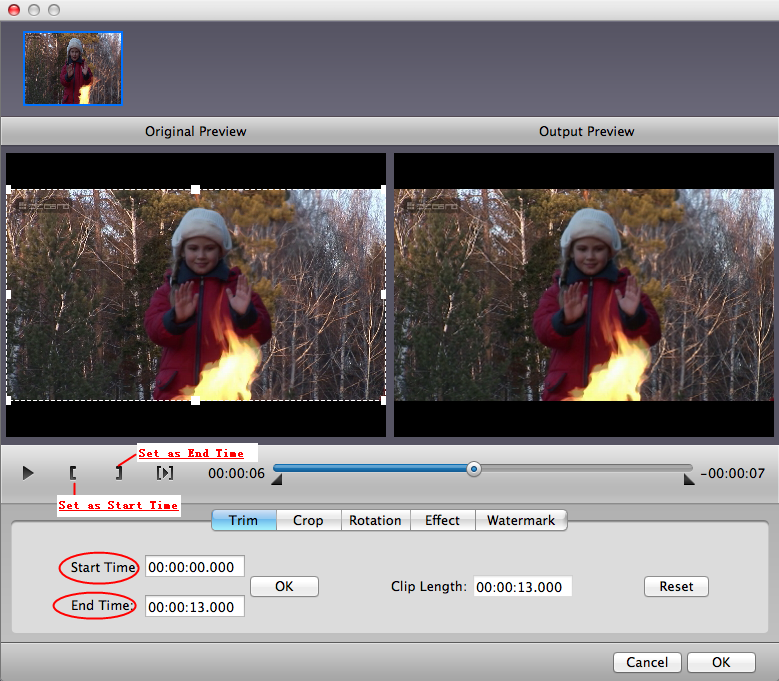
1. Trim the video
As the best Mac video converter, Video Converter for Mac can help you to trim video precisely to millisecond. Click “Trim” tab and start trimming with “Set as Start Time” button while end the trimming with “Set as End Time” button or simply set the start time and end time in the corresponding boxes.
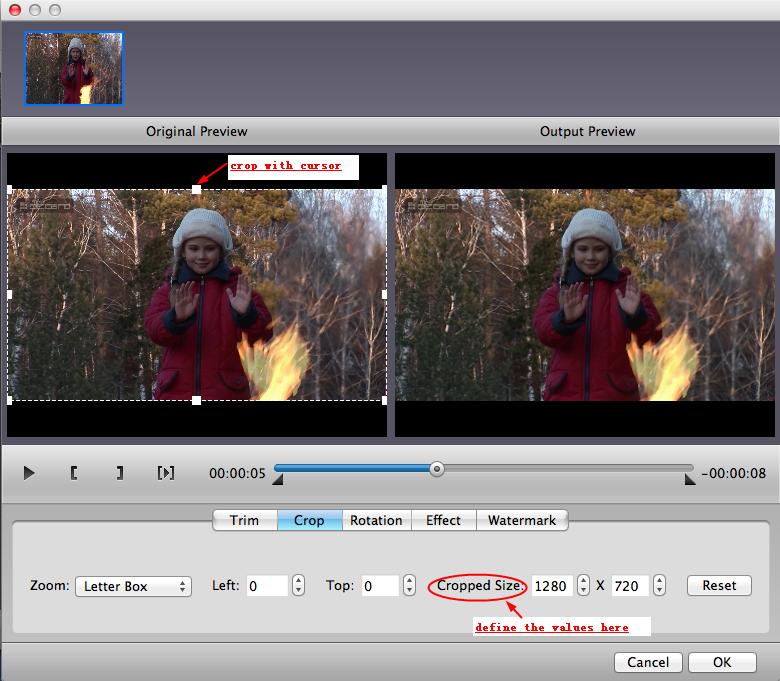
2. Crop the video
Click “Crop” tab and then Mac users can crop the video size either by defining the values in “Cropped Size” boxes and other relative boxes or by changing the video size with cursor.
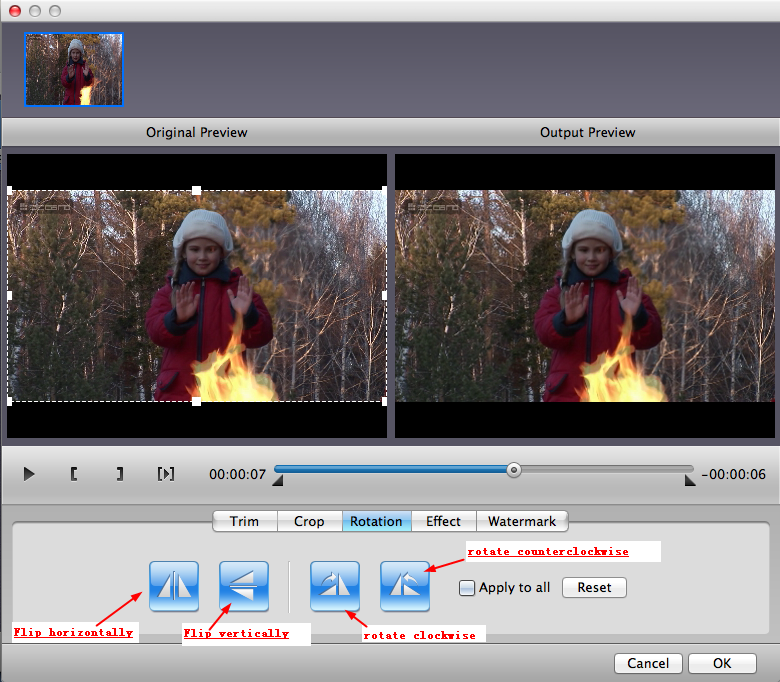
3. Rotate the video
In order to help Mac users to view the video from different angles, the function of rotation is provided here. Mac users can flip the video horizontally or vertically and rotate the video 90° clockwise or counter clockwise with the corresponding buttons.
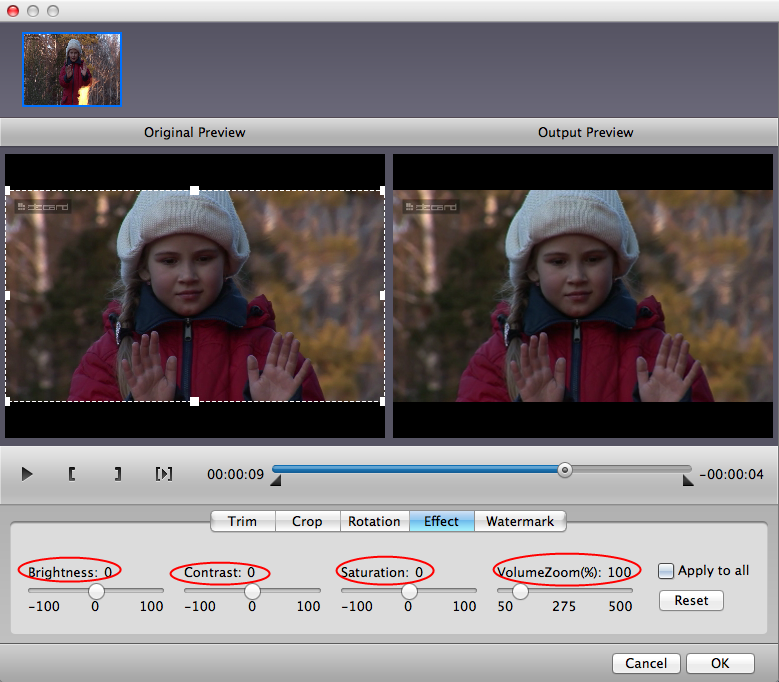
4. Add effects to the video
Click “Effect” tab and then Mac users can easily adjust the brightness, contrast, saturation and volume zoom of the video with corresponding bars in the interface.
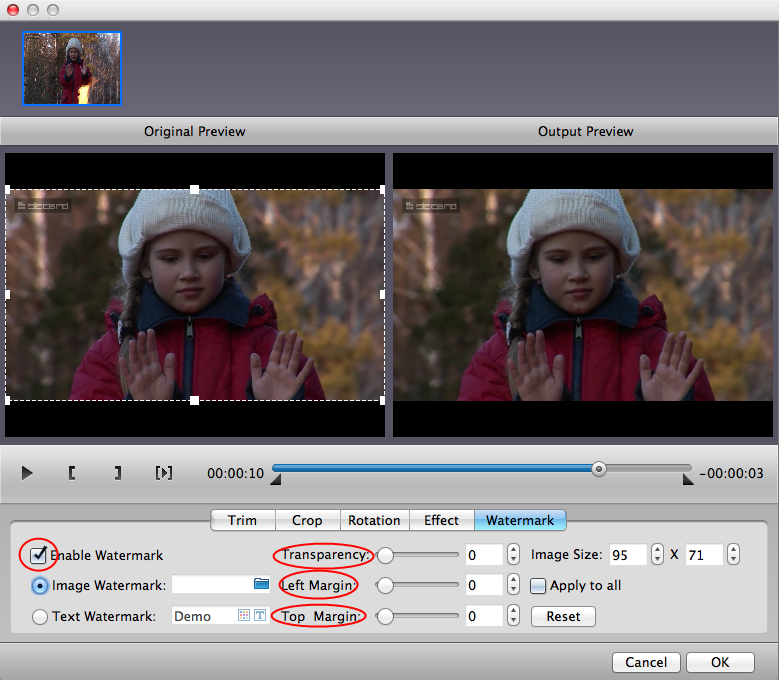
5. Add watermark to the video
Click “Watermark” tab and then check “Enable Watermark” box. After that Mac users can add either image watermark or text watermark to the video. Locate the watermark with “Left Margin” and “Top Margin” bars and adjust the transparent degree of the watermark with “Transparency” bar.
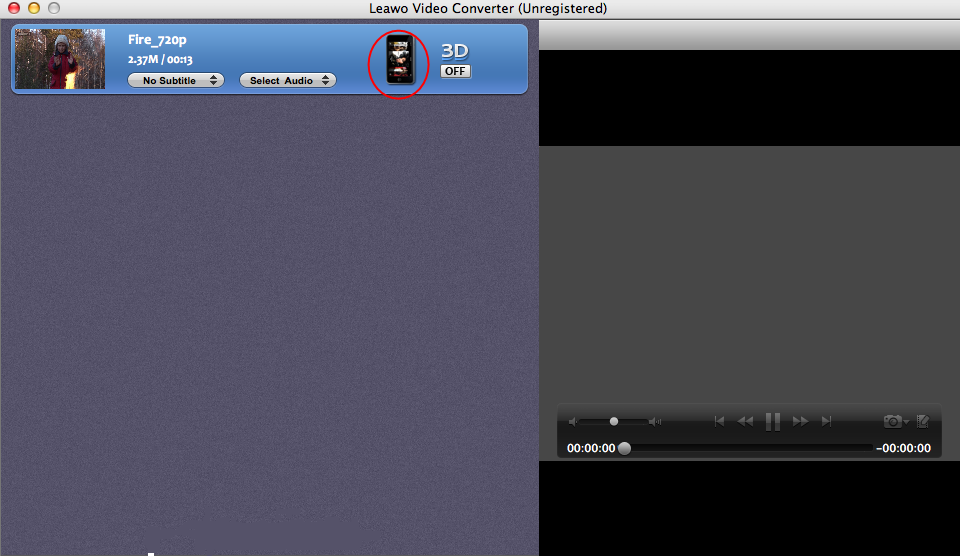
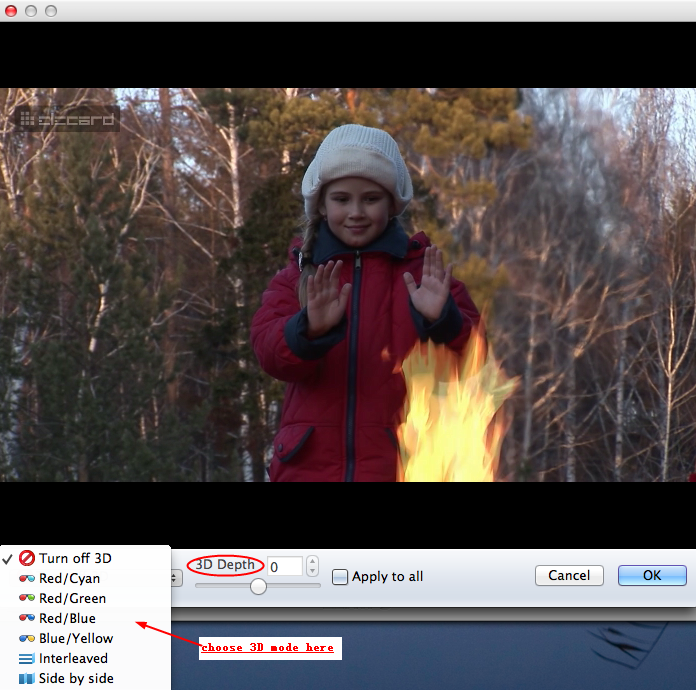
Step 4: Add 3D effects to the output video. Click 3D icon in the interface and then choose “3D Settings” in the drop-down menu.
After that, Mac users can choose the 3D modes they want in the drop-down menu as well as adjusting the 3D depth with the corresponding bar. When all is done, click "0K" button and then click conversion button
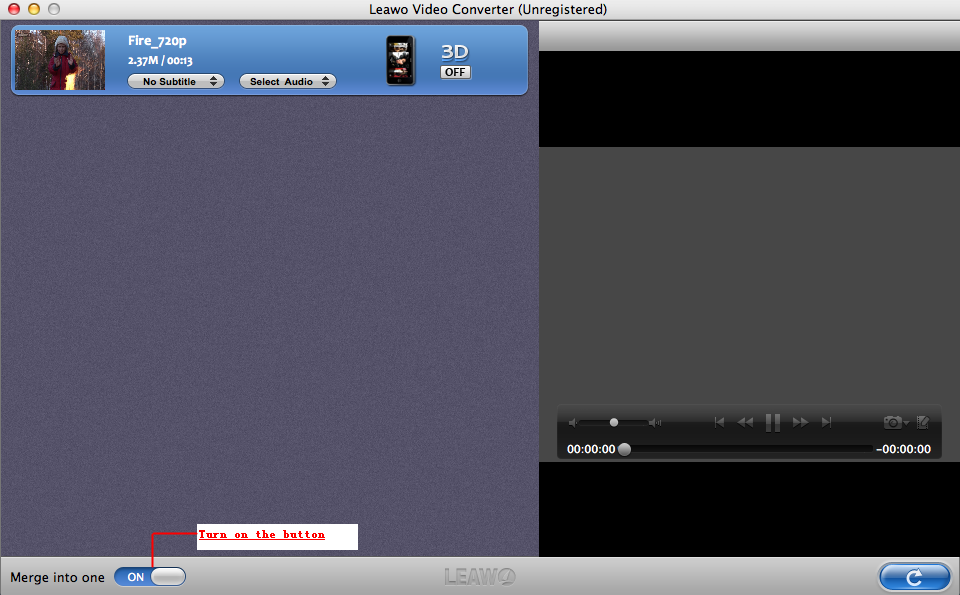
How to merge videos with Video Converter for Mac?
In order to merge videos, Mac users need to turn on “Merge into one” button and then right click the video and choose “Add Video Files” option in the drop-down menu.
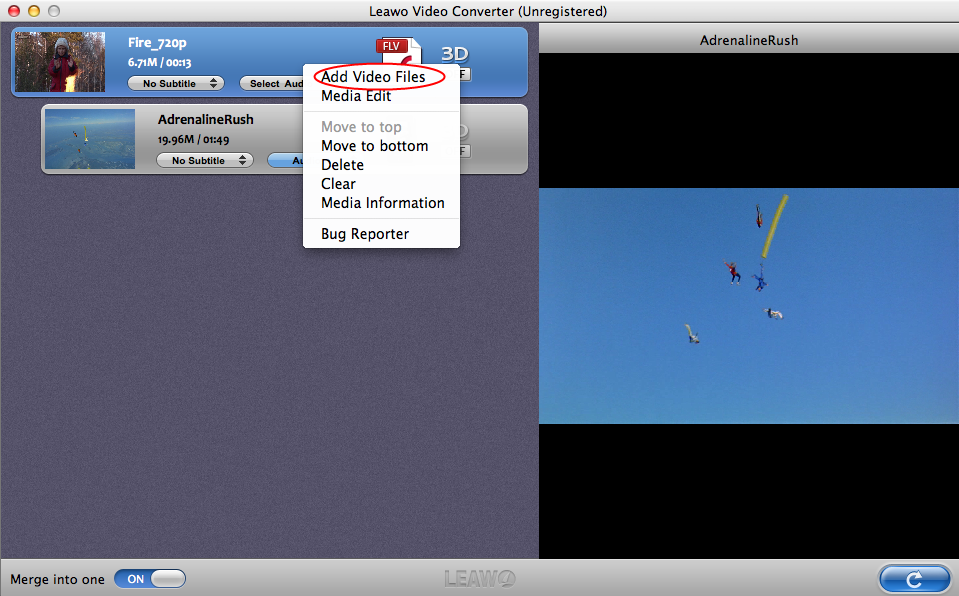
Define the output format for one file and then all the files are defined automatically. Click conversion button and then these videos will be merged into one.
Those are the steps to convert videos as well as add 3D effects to the converted video on Mac. With such a powerful tool in hand, Mac users can watch any videos freely with MacBook, Mac mini and iMac.