Step 1: Conversion Settings
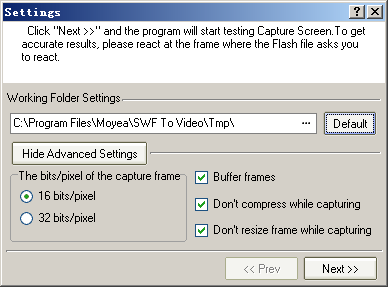 Working Folder:
 Click the Browse button to specify a folder on your hard disc as the working folder. The working folder is used to save the temporary files generated during the conversion process and these files may occupy very big disc space. So we recommend that you specify the working folder on a hard disc with big enough space.
Hide Advanced Settings: Click to hide the advanced settings.
Color Quality: The program allows you to the color bits/pixel for capturing frames during the conversion as 16 bits/pixel or 32 bits/pixel. The 16 bits/pixel method can greatly reduce the usage of your CPU by the program. If your Flash file is not very complicated with lots of different colors, there will not be any video quality loss that can be determined by unaided eye. The 32 bits/pixel method will not cause any video quality loss, but it will use much more of your CPU.
Buffer frames: Check this option to improve the program efficiency if you are using a dual-core CUP, a hyper-threading CPU, or mutiple CPUs.
Don't compress while capturing: Check this option and the program will not compress the acquired data while capturing the frames of your Flash file. This will drastically reduce the usage of your CPU by the program. If the output quality is not satisfactory but you do not want to reduce the capture speed, you can check this option to see if the conversion quailty can be improved.
Don't resize frame while capturing: Check this option and the program will not resize the frames while capturing them during the conversion process. If there is any bitmap in your Flash file, we recommend that you check this option to avoid the distortion of the final video file. Otherwise, you can just leave this option unchecked.
Step 2: Capture Test
Click the "Next" button and the program will start testing the capture. To get accurate results, please react at the frame where the Flash file asks you to react.
Step 3: Set Capture Speed
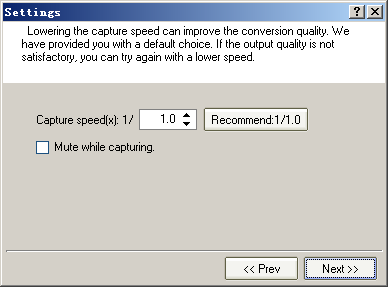
You can set the Capture speed by setting the denominator in the number box. For example, if you set the number to 2, the capture speed will be 1/2 of the original playback speed. Lowering the capture speed can improve the conversion quality. We have provided you with a default number, if the output quality is not satisfactory, you can try again with a lower speed. Click the "Next" button to start conversion.
Mute while converting: Check this option and the sound will not be played during the conversion.
Play Speed: Allow you to set a play speed of your Flash file during the period of the conversion. The available speeds range from 1/24 of the original speed to 100% of the original speed.
Step 4: Start Capture
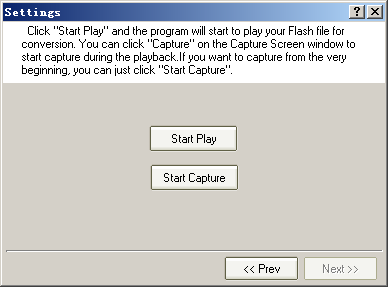
Click "Start Play" and the program will start to play your Flash file. During the playback, you can click the "Capture" button at the bottom of this window to capture the current frame as the first frame of the final video file. Then this button will become "Finish". Click "Finish" when you want to set the last frame of the final video file and the conversion will be started.
If you click the "Start Capture" button, the first frame of the Flash file will be set as the first frame of the final video file. Then you can click "Finish" when you want to set the last frame of the final video file during the playback to start the conversion.
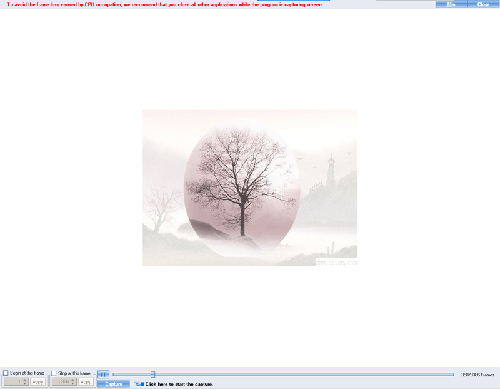 Start from frame:
 Set the first frame of the final video file by selecting the frame number. Click Apply to apply the selected frame as the first frame.
Stop at frame: Set the last frame of the final video file by selecting the frame number. Click Apply to apply the selected frame as the last frame.
After setting the first frame and the last frame by selecting their frame numbers, click "Capture" and the program will start conversion. Wait a while and the conversion will be finished.
Note: Lowering the play speed can improve the conversion quality. We have provided you with a default choice. If the output quality is not desirable with, you can try again with a lower speed..